Learn How To Make Soy Candles at Home

How to make soy candles at home. Simple instructions for amazing results. It's Candle Making Time!

Learn how to make incredible soy candles at home. Simple instructions for amazing results. It's Candle Making Time!
  • Home
  • The Soy Candle Making Book
  • Blog
    • Business
    • Recipes
    • Supplies
  • Resources
  • FAQ
  • About
    • Contact
  • Advertise

Soy Candle Making Instructions!

Find lots of soy candle making instructions right here! Learn how to make several types of beautiful soy candles that can be used for personal use, as gifts, or to sell.

Soy Candle Making is Fun!

Making soy candles is a fun and rewarding hobby or business and you will find tons of information here on this site to ensure that you get off to a great start in your soy candle making venture. Be sure to check out my videos, Frequently Asked Questions page and where to buy your supplies.

I hope you enjoy all the wonderful soy candle making recipes below. Remember, don't be afraid to experiment and be creative with your candles too!

Make sure to get a copy of my new eBook "The Soy Candle Making Book" for even more recipes!


How to Make Soy Mason Jar Candles

May 28, 2018 by SoyCandleMakingTime 28 Comments

Mason jar candles are beautiful and go great with a country theme! We’ll be using mason jars in this recipe , but you can pretty much use any jar or glass as long as the glass isn’t too thin. You’ll want to use jars, or glass that can withstand heat.  You’ll need to experiment with the wick size but I’ve listed the wick size below that has worked great for me in soy candles made using 8 and 16oz Square Mason Jars. For in depth wick sizing instructions as well as more recipes and techniques,my  book  “The Soy Candle Making Book” is a must have.

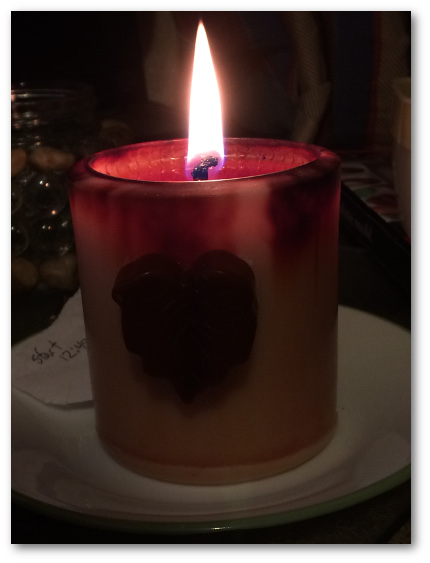
Soy Mason jar candles are excellent for gifts!

How to Make a Soy Candle

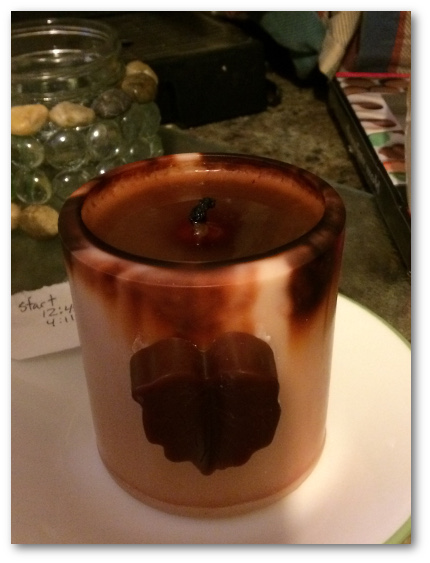
Making mason jar candles with soy wax

Some of the links below may be affiliate links. This means I may earn a small commission if you click through to those links, or make a purchase through them. This is one way that we are able to keep this site up and running.  I only recommend products I have used and found to be helpful and cost effective.

Let’s get to it! I have been making my own soy candles for several years, and I am going to show you how to make mason candles at home with a tried and true recipe that I used when I was selling my soy candles, and that I still use. Keep in mind that there are different types of soy candle waxes and this recipe is meant for the specific wax I mention in the supplies. You can use this recipe with other soy waxes, but the melting and pouring temperatures may vary for best results.

First let’s look at some

Tips for Soy Candle Making Success

Fragrance is key here. You need to make sure you use quality fragrance oils in your soy candles. Dollar store, and even craft store fragrance oils won’t cut it! You need to buy your oils from a candle making supplier. There are quite a few online, and some have store fronts you can go and visit as well. You want to look for oils that give a good fragrance throw in soy wax specifically. Visit our article on Best Fragrance Oils for Soy Candles to learn more.

The other question I hear a lot is whether you can use essential oils when you make soy candles. Yes, you can, but should you? I don’t disagree that there are benefits in aromatherapy, but once the essential oils are burned in a candle, the oil becomes useless, and, in my research, it could also become harmful to breath in.  I have tried a few essential oils, but they don’t give off as much fragrance and they are expensive! So my advice is to just use fragrance oils that were meant for candle making.

As I said earlier, if you are using jars other than mason jars for your container candles, please be sure that they are heat safe. You don’t want shattered glass and possible fire! You can find great prices on square mason jars and other types of candle making jars by checking out some wholesale candle making suppliers here

If you don’t have wick stickers that I suggest below, you can use a hot glue gun to attach the wick to the bottom of the jar or glue dots.


Supplies to Make Soy Mason Jar Candles:

  • Scale, digital preferred (I love the Escali digital scale. Battery lasts forever!)
  • Candy thermometer
  • High temp resistant Rubber Spatula for stirring and scraping wax out when pouring.
  • Metal pour pot
  • Metal cooking pot
  • 1 lb Soy Container wax (I use 100% Midwest Soy Container Wax with this recipe)
  • 1 oz candle Fragrance Oil
  • Candle wax dye
  • Two 8oz square Mason Jars or other canning type jars
  • 2 Candle wicks for soy wax such as HTP 105 or CD-18
  • Wick Stickers to stick the wicks to the bottom of the jars
  • 2 long chip clips to keep the wick centered in the jar while the soy candles are cooling.

Soy Mason Jar Candle Directions:

How to make a soy candle
  • Gather your candle supplies and put some wax paper down on the counter
  • Put your Mason jars on the wax paper
  • Put wick stickers on the bottom of the metal wick tab
  • Center wick and place one in each jar pressing firmly so that the wick sticker will adhere to the jar properly. Sometimes it won’t if the jar is too cold so you may need to warm the jar up a bit first.
  • Put your Pour Pot on the scale and 0 it out. Pour 1 lb of wax into the pour pot.
  • Set your cooking pot on the stove and pour water into it so that it is about 1 and a half inches deep.
  • Set your Pour pot with the wax in it, inside the cooking pot and turn stove to medium low.
  • Set your candy thermometer in the pour pot. Set a timer for about 10min. So you don’t forget about the wax and keep an eye on the thermometer.
  • When the thermometer reaches 180 degrees, take the pour pot out and set it on the scale again and 0 it out.
  • Next add your one ounce of fragrance oil (by weight) and stir well.
  • Now add the dye before the wax cools below 165 degrees. If it has already cooled too much, just set the pour pot back into the pan of water and heat it back up to 170-180 degrees.
  • Stir the dye well and then let the wax sit and cool.
  • When the soy wax reaches 95-110 degrees it is time to pour into the candle jars. Stir a few times again first. Slowly pour the soy wax into your mason jars. Pouring slowly makes sure that you don’t have any air bubbles. Once you have filled your mason jars you can carefully put the chip clip on each candle wick to keep it centered in the jar while cooling.
  • Let the soy candles cool for at least an hour before taking the clips off and trimming the wicks to about 1/4 inch.
  • Let the soy candles cure at least 24 hours before burning them. A couple of days is ideal.

You can make mason candles for yourself, as gifts, or sell them! As always, let me know if the directions are clear enough or if you have any problems or questions with your candles!

Want more soy candle recipes and in depth instruction?

Download The Soy Candle Making Book today!


Filed Under: Soy Candle Making Instructions

The Fall Soy Pillar Candle Experiment

November 10, 2016 by SoyCandleMakingTime 13 Comments

Decorative Fall Soy Pillar Candle


A few weeks ago I made a soy pillar candle. “But soy wax is too soft for making pillars” you might say….. Not if you use a soy pillar blend wax. The two kinds that come to mind, Ecosoya PB and American Soy Wax P-100, are both made up of mostly soy wax with some vegetable oil additives (or something like that). So, while they aren’t 100% soy, they are pretty close to it.

I made a couple pillar candles a few months ago after I bought some molds and supplies from Candle Science, and they both turned out pretty well, but this time I wanted to try something different.

First of all, here’s the supply list:

15oz Ecosoya PB soy wax

1oz or up to 1.5oz fragrance oil

3×3.5″ round pillar mold

Metal wick bar

Duct tape

Hot glue or Wick Sticker/Stickum

Spool of Eco 14 wick

Brown liquid candle dye

Scissors

Chocolate mold or candy mold of fall leaves. I got mine at Michaels craft store, but there are also some here on Amazon


I don’t have pictures for the whole process at the moment, so I’m just going to show from when I poured into the mold. I’ll do a separate post on exactly how to make these, but you can just follow the melting directions on the Votive recipe.

Here’s what I did to prepare the mold. I wanted to try and make a cool design on the sides of the pillar candle by using a q-tip to draw with brown dye on the inside of the mold.  I was hoping if I let the dye dry a bit before I poured, it would hopefully stay put.

Preparing soy pillar mold design

I wanted to do a fall design, so I drew leaves and then wanted a brown ring around the top of the candle (the bottom of the mold)

Drawing inside the pillar mold

Then I poured the pillar candle at about 175 and let cool. As soon as I started to pour, I could see that the dye was not going to stay put and it began to sink down to the bottom of the mold. Oh well, I tried! lol  We’ll see what it looks like after it cools!

After pouring the soy pillar candle

Soy pillar candle cooled

After cooling, I needed to cut the wick and pour a bit more wax in to make the bottom of the candle smooth and cover up the wick (the top of the mold is the bottom of the candle)

Then after sitting overnight, I popped the soy pillar candle out and this is what I found……Soy pillar candle after removing from mold

Not what I had in mind, but hey, I think it still looks pretty cool! So I then decided to dress it up a bit with some of the extra wax I had left. I added  a bit of brown dye to the wax and poured myself some leaf wax melts as you’ll see below:

Poured soy pillar wax into fall leave chocolate molds Cooled soy wax melts fall leaves

That odd light colored one was from some extra wax I had from a couple jar candles I made. It got kind of frosted since it was made with container wax and I wasn’t paying too much attention to what temp I poured at.

I used a chocolate mold I found at Michaels craft store. I love how these fall leaf melts turned out! (you can also find these molds, and others like it, here

Then I attached one of the leaves to the soy pillar. Just melted a little wax and used it like glue to put the leaf on.

Putting the fall leaf onto the soy pillar candle

I just love the way this turned out, and I am planning on doing some for Christmas presents I think! I’m thinking I need to find some snowflake chocolate molds and do the same thing, only with some blue dye and make the snowflakes blue.  You could even put some glitter on the snowflakes.

The cool thing about this, is that you can “glue” these melts to the pillar and have a pillar candle, and then when it melts too low, use the melts in a tart warmer (Scentsy, or other type of warmer).  If you sell your candles, this might be a great selling point too!

The only thing I didn’t care for, is that the leaf stuck out kind of far. It looks good with just the one leaf, but I think if I were going to put some all the way around, I wouldn’t fill the leaf mold up as much, maybe halfway, so they don’t look so bulky.

So here are pictures of how the candle burned. I really love the way it looks. At some points I tried to do the “hug the candle” thing ( I learned from Parylite) so that you gently squeeze the sides of the candle in closer to the flame so more of it will melt and not just completely tunnel down.  You have to be careful with soy pillar candles though because they aren’t as elastic as paraffin wax, therefore you can easily break the sides off instead.

Anyway, so here are pics of it burning:

Flame was a little high at first, but then it settled down after it started melting the wax.

soy-pillar-candle-9

Just thought it looked kind of neat in this picture after the first burn….soy-pillar-candle-10 Burning a soy pillar candle

You can see in the picture below, that I “hugged” the sides of the candle. Once it had burned down a ways, and while the sides are soft, I just gently push them toward the flame a bit.

Fall soy pillar candle burning Soy pillar candle burning


And, then eventually the leaf fell off 🙂 It was bound to happen lolBurning a soy pillar candle


Had a little bit of a blowout at the end. I let it burn too long (I think about 5 hours or so) and it ended up getting a small hole on one side. It’s okay though. I can always use the rest of the wax in my tart melter. Soy pillar candle almost all the way melted

Well, that’s my decorative soy pillar candle experiment. It turned out great I think!  The candle burned nicely almost all the way down (until I let it go too long that is!) .

Now the big questions…. How long did it burn? About 35 hours. It would have burned longer though if it hadn’t leaked all that wax out toward the end.

How did it smell/hot throw?  Well, I used Amarreto Nog from Candle Science. It was kind of a light throw (couldn’t smell it much while it was burning, or even when it wasn’t). I could try using more, but I’ve also heard from another candle maker that Amarreto Nog doesn’t throw well anyway.  So next time I will try another fragrance.

That’s it for now! Let me know what you think in the comments!


Filed Under: Soy Candle Making Instructions Tagged With: Fall decor

How To Make Soy Votive Candles

February 19, 2016 by SoyCandleMakingTime 3 Comments

So you want to learn how to make soy votive candles? Well, it’s actually pretty simple and you can do it right in your own kitchen! Soy votives make wonderful gifts for any occasion and it’s wonderful when you can make a gift yourself, adding your own fragrance or fragrance blend as a special personal touch. Votives are small and you can make a lovely sampler pack as a gift. For those who are looking to start their own candle business, I have used these same instructions for making my own soy votive candles for my previous business and they were always a big hit!

First you’ll need a few supplies:

  • 8 Votive molds. I use metal votive molds with a wick pin. I bought mine from Candlesoylutions: Votive Molds Wick Pins
  • 8 votive candle wicks. I’ve found the best to use are the P-22 large base wicks from Candlesoylutions
  • Pour Pot, or double boiler setup. I like using the pour pots, but when I started out, I just used a small sauce pan with some water in the bottom and a metal bowl sitting on top that I poured the soy wax into.
  • Rubber Spatula that can withstand heat, or plastic spoon.
  • Glass candy thermometer
  • 1lb Soy Votive Wax (The link will take you to Candlesoylutions, my favorite supplier)
  • 1oz fragrance oil of your choice Candle dye, any color you choose, or you can start with no dye.


How to make soy votive candles:

  1. First, set up your votive molds with the wick pins in them on some wax paper on your counter or table. The wax paper will keep you from having to wipe up spills once you’re done making your votive candles.
  2. Put your pour pot, or metal bowl on a scale (preferably a digital one) and 0 it out. Pour your soy votive wax in until the scale says 1lb.
  3. Set your pour pot in the pot with water in it (about an inch or 2) or set your bowl or double boiler pot on top of the pot with water in it.
  4. NEVER put the pot or bowl with wax directly on the stove as it could combust! Always use water surrounding the pour pot, or use a double boiler set up.
  5. Set the stove to med-low heat (aprox. 4).
  6. Put the thermometer in the wax and set your timer for 15 min. so you remember to check on the wax.
  7. Once the soy votive wax has melted and reached 195-200 degrees F. Take the pour pot, or bowl off the stove and set it onto the digital scale. 0 out the scale again.
  8. Once the wax is down to about 185 degrees, pour 1oz of fragrance oil (by weght) and stir a couple times. Then add a couple drops or so of your choice of candle dye according to what color you want, and stir a few more times until everything is incorporated.
  9. By now the wax should be about 175 degrees. This is the time you should pour into your votive molds. You don’t want it to cool like you do with soy container candles.
  10. Once you have filled each votive mold, it is time to wait till they are completely cooled before pulling them out of the metal molds. They should just pop right out when they are cool enough. Usually takes about an hour or two depending on the room temperature.

So that’s how to make soy votive candles, and I hope you have fun making special gifts for family and friends. Contact me if you have any questions or if I left anything out or didn’t make something clear enough.

How To Make Soy Votive Candles
Author: Melissa Hall
Ingredients
  • 8 Votive molds.
  • 8 votive candle wicks.
  • Pour Pot, or double boiler setup.
  • Rubber Spatula that can withstand heat, or plastic spoon.
  • Glass candy thermometer
  • 1lb Soy Votive Wax
  • 1oz fragrance oil of your choice
  • Candle dye, any color you choose, or no dye.
How to Make Soy Votive Candles Instructions
  1. First, set up your votive molds with the wick pins in them on some wax paper on your counter or table. The wax paper will keep you from having to wipe up spills once you’re done making your votive candles.
  2. Put your pour pot, or metal bowl on a scale (preferably a digital one) and 0 it out. Pour your soy votive wax in until the scale says 1lb.
  3. Set your pour pot in the pot with water in it (about an inch or 2) or set your bowl or double boiler pot on top of the pot with water in it.
  4. NEVER put the pot or bowl with wax directly on the stove as it could combust! Always use water surrounding the pour pot, or use a double boiler set up.
  5. Set the stove to med-low heat (aprox. 4).
  6. Put the thermometer in the wax and set your timer for 15 min. so you remember to check on the wax.
  7. Once the soy votive wax has melted and reached 195-200 degrees F. Take the pour pot, or bowl off the stove and set it onto the digital scale. 0 out the scale again.
  8. Once the wax is down to about 185 degrees, pour 1oz of fragrance oil (by weght) and stir a couple times. Then add a couple drops or so of your choice of candle dye according to what color you want, and stir a few more times until everything is incorporated.
  9. By now the wax should be about 175 degrees. This is the time you should pour into your votive molds. You don’t want it to cool like you do with soy container candles.
  10. Once you have filled each votive mold, it is time to wait till they are completely cooled before pulling them out of the metal molds. They should just pop right out when they are cool enough. Usually takes about an hour or two depending on the room temperature.
3.2.1275


Filed Under: Soy Candle Making Instructions Tagged With: votive candles

Tilted Layer Candles How To-Candy Cane Christmas Candles

December 20, 2015 by SoyCandleMakingTime 3 Comments

candy-cane-jar-candle

Layered candles are pretty cool, but tilted layer candles take it to a whole new level. You can make many different patterns using this technique, using 2 or more colors and/or fragrances.

Every year around Christmas the past few years, my dad orders about a dozen candles from me so he can give them to his coworkers as gifts. There are always several candy cane candles among them and I usually make them as chunk candles. Everyone loves them!

This year I decided to try doing tilted layer candles, and not just tilted, but zigzagged.  I had ordered a certain amount of Candy Cane fragrance oil, and had only enough to do the amount of candy cane candles my dad had asked for, so I was hoping I wouldn’t mess them up! lol

They turned out great though! Below you’ll find the instructions. If you’ve never made soy container candles before, you’ll want to go to my Mason Jar Candle Recipe and see the instructions for melting the wax, adding fragrance/dye, and cooling.

How To Make Candy Cane Tilted Layer Candles

Make up two batches of wax. We’ll just do two colors here, but you can do more than two.

We’ll do two 8oz jar candles for this so you’ll want to have two pour pots with 8oz of wax in each (I used Midwest Soy 100% Container Wax).

We’ll leave one batch of wax uncolored, and the other we will dye red.

Start with the uncolored wax pour pot.

Use 1/2oz Candy Cane fragrance oil once you’ve melted the wax to 185 degrees F.

Stir a few times and then let the wax cool to 100 degrees F.

While the wax is cooling, you can set up your jars.

First add your wick. I used CD 16 in these, but Eco 10 or 12 would do well too (you’ll want to test if you haven’t already) I love the long bag clips for this because you can get them on there nice and tight so they don’t move when you tilt the jars. Other wick holders will just slide around.

makeup-wedge-mason-jar

I used a makeup wedge for tilting the jar since I didn’t have anything else on hand and someone in our candle making group suggested it. It worked well, but what would work even better is a bowl or box with some sand in it. That way you could tilt the jars however you want to make different effects, and the jars will be even more stable.

Once you’ve placed your wicks, set the jars on the makeup wedge (or sand).

tilted-jar-candle

When the first layer wax is cooled to 100 degrees F. go ahead and pour the first layer. Set that pour pot aside and wait until the first layer is completely cool. This is important. If you don’t wait till it is hardened, the second layer may bleed into it. (this could give you a cool effect too, though, so feel free to try it if you like)

first-wax-layer

Once the first layer is set and cooled, turn the jar around so that it is tilted the opposite direction.tilt-other-direction

Now melt your second layer wax, add fragrance oil and red dye at 185 degrees F. I used 1 cinnamon red diamond dye (reddi-glo from Candle Science). If you use any dye chips like this, you’ll need to make sure to stir until it is completely melted into the wax.

Let cool to 100 degrees F. and then you can pour the second layer.pour-second-wax-layersecond-wax-layer

Now let that layer cool and you can remelt the non-colored wax to about 100 degrees F and pour the 3rd layer.third-wax-layer

Let cool completely, remelt the red wax and pour the last layer.  Before you pour the last layer, you can take the wedge out from under the candle so the top will be flat.

tilted-layer-last

layered-candy-cane-candles


And there you go! Not difficult at all, but it does take time. Be patient, have fun and get creative!


Filed Under: Soy Candle Making Instructions, Uncategorized Tagged With: Christmas

Simple Fall Centerpiece Craft-Autumn Candle Decorating Idea

September 22, 2014 by SoyCandleMakingTime 4 Comments

fall candle centerpiece


I LOVE Fall! I love Summer too, but around halfway through I am looking forward to Fall and cooler days and nights and all the beautiful colors. I think Fall decorating is probably right up there with Christmas decorating. I don’t usually get to do much decorating in my home, but the other day when the boys were at a friends house so I could get a candle making video done, I decided on a whim, to stop over at Hobby Lobby and find some decorations to make a Fall centerpiece. I found some great stuff and Fall decor was 40% off, so that was a huge plus (because I think some of their stuff is a little pricey….).

So instead of the video I had originally planned, I ended up doing this fall centerpiece craft. It was so simple and turned out beautiful! Now if only I had a diningroom table to display it! But, alas, my house is too small for a dining table. Someday.

Supplies

Now, I bought all these supplies at Hobby Lobby because there were certain things I knew I wanted to get there, so I just ended up buying all the supplies there. I am persuaded that you could stop in at the Dollar Tree and buy most of these supplies and save even more money, although their leaves tend to not be very good quality and they don’t look as real as the ones I got from Hobby Lobby.

Also, keep in mind that I did not use all of the leaves or pinecones, so you would have enough of those left over to make something else!

  • 1 package of fall leaves $4.79
  • 1 bag of pinecones, nuts, etc… $7.19
  • 1 bag of 3 small corn on the cob decor $2.09
  • 1 bag of decorative rocks (I bought mine at the Dollar Tree) $1.00
  • 1 large platter (the one I bought at Hobby Lobby was only $1.99 since it is a coated plastic or something but it looks nice and it is sturdy)
  • 1 decorative glass container large enough to put a smaller glass candle inside $2.99
  • 1 small glass container candle (I used a 4 oz. Roly Poly that was from a Partylite candle). The fragrance is Sweet Potato Pecan Pie from Candlesoylutions.   You can make one yourself, or you could just buy a small jar candle. You could also just stick a tealight in there as well, or a votive inside a tight votive holder, or even a small pillar candle would look wonderful.  Just be careful with the pillar candles or if you are using a taper candle because the wax may drip onto the rocks, so, especially with the tapers, you would want to put it in some sort of holder that will catch the wax.

Instructions:

All you do is place the larger glass in the center of the platter, then place the leaves all around and then the pinecones, nuts and corn on top of that. Very simple! You can put rocks in the larger glass or you could do dried corn or some other non-flammable decor (marbles, shells, etc…). Then place your candle inside the decorative glass on top of the rocks or whatever you have inside.

I did not glue my decorations onto the platter, but you could certainly hot glue them so you can have a permanent decoration, or leave them loose so you can rearrange into something else later if you like. If you have kids that might like to grab at it, I would go ahead and glue the leaves and pine cones down at least.

fall-centerpiece-1


fall-centerpiece-2


fall-centerpiece-3

Filed Under: Soy Candle Making Instructions, Table Centerpiece Ideas Tagged With: DIY Centerpieces

  • 1
  • 2
  • Next Page »

Make Soy Candles You’ll Love!

Get The Soy Candle Making Book

How To Make Soy Chunk Candles

How To Make Soy Jar Candles

How To Make Wax Melts

  • Privacy Policy
  • About
  • Contact

Copyright © 2025 SoyCandleMakingTime.com ·