Learn How To Make Soy Candles at Home

How to make soy candles at home. Simple instructions for amazing results. It's Candle Making Time!

Learn how to make incredible soy candles at home. Simple instructions for amazing results. It's Candle Making Time!
  • Home
  • The Soy Candle Making Book
  • Blog
    • Business
    • Recipes
    • Supplies
  • Resources
  • FAQ
  • About
    • Contact
  • Advertise

How To Make Soy Tealight Candles- 8 hour tea lights

May 5, 2013 by SoyCandleMakingTime 4 Comments

Today I’m going to show you how to make these wonderful scented soy tealight candles right at home! Tealight candles are excellent for using in your tealight holders whether for weddings or other special occasions. For weddings, you can even leave them uncolored because the natural color of soy wax is a creamy white.  You can leave out the fragrance oil and make them unscented, in which case you only need to heat the wax up until it is melted completely since there is no worry about making sure the wax is hot enough to incorporate with the fragrance oil and dye.

View the video above to learn how to make tealight candles, or scroll down to read the instructions on this page

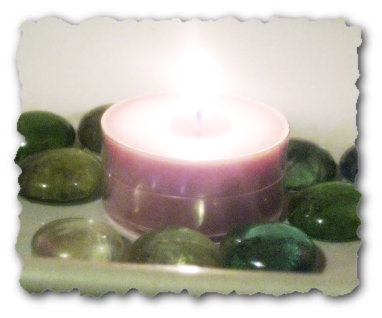
These little tea lights will burn up to 7 to 8 hours! Twice as long as Party Lite tealight candles, and even longer than that with the cheap store bought tealights in the metal cups.

I will caution though, that if you plan on burning these in an enclosed holder, you may need to use metal cups because the plastic cups can get too hot and melt. Plastic tealight cups are more for open style holders

 Tealight Candle Supplies

Let’s see what supplies you’ll need: (Check out my list of favorite suppliers)

  • A kitchen scale. Digital is best, but you can use any kitchen scale.
  • A candy thermometer to keep an eye on the temperature.
  • A rubber spatula for stirring the wax
  • A metal pour pot for candle making
  • A metal cooking/sauce pot
  • 1 lb of Soy Container wax
  • 1 oz of candle Fragrance Oil
  • Candle wax dye
  • 20 plastic or metal tealight cups
  • 20 tealight candle wicks

Soy Tealight Candle Making Instructions:

Get the candle making supplies together and set them on wax paper on the work area

Set the tealight cups on the wax paper and place the wicks in them making sure they are standing fairly straight and centered.

Set the Pour Pot on the scale and 0 it out. Pour in 1 lb of the soy container wax.
Place the sauce pot on the stove and pour water into it so that it is about 1 and a half inches deep.

Set the Pour pot with the wax in it, inside the cooking pot and turn stove to medium low.
Place your candy thermometer in the soy wax. Set a timer for 10min to help you keep an eye on the wax and thermometer.

When temperature is 180 degrees, take the pour pot out and set it on the scale again and 0 it out.

Pour into the melted soy wax, 1oz of fragrance oil (by weight) and stir well.
Now add the dye before the wax cools below 165 degrees. If it has already cooled too much, just set the pour pot back into the pan of water and heat it back up to 170-180 degrees.

Stir the dye well and then let the wax sit and cool.

When the soy wax cools down to 95-110 degrees it is time to pour it into the tealight cups. Stir a few times again first.

Slowly pour the soy wax into the tealight cups. Pouring slowly makes sure that you don’t have any air bubbles.

When all the tealight cups are filled (you may have some leftover or it may not quite fill all 20 cups), go around each one and re-center the candle wicks, making sure they are straight again.

Let the soy candles cool preferably at a room temperature of 70degrees or more. (if it’s too cool, colored candles will frost)

Allow the soy tealights to cure for at least 24 hours before burning them for the best fragrance throw. Uncented soy tealights can be burned as soon as they are completely cooled.

Soy Tealight Candle

Want more great soy candle recipes and in depth instruction, troubleshooting, where to buy supplies, finding the right wick and much, much more??

Click HERE to learn about “The Soy Candle Making Book” and what it can do for you!

ScentSational Candles Premium Soy Scented Candles

Filed Under: Soy Candle Making Instructions

How To Make Soy Chunk Candles

May 5, 2013 by SoyCandleMakingTime Leave a Comment


 Want some more awesome soy candle recipes and in depth instruction?

Click HERE to learn about”The Soy Candle Making Book”


Soy chunk candles are made by filling a glass container with chunks of colored, scented wax, and then poured over with another color/scent that will allow the colored chunks to show through when it is set. These are beautifull candles that make some neat colors when the chunks melt together with the overpour color, as well as mingling both scents together as it melts.

How to make soy chunk candles in containers:

First what you will need:

  1. Sharp knife (like a steak knife, smooth bladed)
  2. Scale. Digital scales are best for more precise measurement.
  3. Candy thermometer. These don’t cost much at the store
  4. Rubber spatula that can handle some heat (I’ve used some cheap ones that curled up on me. Nothing horrible, but it’s nice to have ones that don’t curl up from the heat)
  5. 8×8 square metal cake pan lined with wax paper all the way up the sides.
  6. 2 lbs of soy container wax (I get mine from CandleSoylutions in Eugene, Oregon)
  7. Four  8oz glass jars. I prefer the square mason jars, but any canning type jar will work fine.
  8. Double boiler type setup. You can use a pot with about an inch or so of water in the bottom and a metal bowl sitting on top of it. You can also just get a pour pot specifically for candle making and set it inside a pot that has water in the bottom. NEVER heat wax on the stove without water surrounding, or underneath the container of wax!!
  9. 4 CD-18 candle wicks (you can try size 16 too, but the 18’s worked best for me)
  10. 4 wick stickers to secure candle wick to bottom of jars.
  11. 4 long clipits, or twixits bag clips (like the ones from Pampered Chef, or IKEA ). These fit very nicely across the top of the jars with the wick clipped into place so it won’t move while the wax cools. Keeps it nice and centered!
  12.  1oz  Blueberry fragrance oil
  13. 1oz White Cake candle fragrance oil
  14. 7 drops blue and 2 drops black candle dyeBlueberry Muffin Soy Chunk Candle

Directions:

First thing I do is get all my supplies together in one place.  Then go ahead and put water in the bottom of the pot.
Set your melting pot that the wax will go into on the scale and 0 it out. Now pour in your wax until you have 1lb of wax on the scale.

Set the melting pot into the pot of water (or on top of the pot if you have a double boiler set up).

Turn the stove on med low. (If yours goes from 1-10, then set it on about 3 just to make sure it doesn’t get too hot)   Use an electric stove, not gas!

Then put your candy thermometer in the wax and it would be a good idea to set your timer for about 15min. so you remember to check it.

When the wax temp reaches 185-190 degrees, take the melting pot off the stove , set it onto the scale and 0 it out. Then add 1oz (by weight) of blueberry fragrance oil and stir with a rubber spatula ( a good one that can handle the heat!) .

Just give it a few stirs and then add about 7 drops of the blue dye and 2 drops of black dye, and stir until the dye is completely incorporated into the wax.

Now for more waiting! Set your timer for about 15min. again so you remember to check on the wax. Once the wax is cooled to about 95-100 degrees, you should see it starting to get a little slushy looking. Now it is time to pour the cooled soy wax into the 8×8 wax paper lined pan. Use the spatula to help any remaining wax out.  Now for some more waiting hehe. 🙂

Once the wax in the pan has cooled so that the center is still soft, but not liquid at all, just about the consistancy of butter (Use your finger to gently press to see how soft it is) use your sharp knife to cut lengthwise strips however wide you want your squares to be. I usually make my cuts about 3/4″-1″ apart and then after you’ve cut the wax lengthwise, go ahead and make your cuts across, so it is cut into squares.  Now leave the wax to cool completely before breaking them apart. Usually an hour or 2 depending on the room temperature.

In the mean time…..
Set your glass candle containers out, put the wick stickers on the bottom of the metal wick tab and center your wicks in your jars. Push down firmly to be sure the wick sticks nicely.  If the wick stickers aren’t wanting to stick to the jar I always just warm the jars up (on lowest oven setting, or stick each jar in the hot water you used for melting the wax, for a few seconds) and then the wick stickers will stick nice and firm.

Arranging the Soy Chunks/Squares

Now that your squares are cooled, you can gently break them apart.

Now it’s time to arrange your squares. Just place one row of wax chunks around the edge of the container and continue stacking one row on top of the other until you reach about 3/4″ from the top. (for an 8oz candle by weight, you only fill an 8oz mason jar to about 3/4″ from the top). You can also place your jar on the scale and 0 it out, and then place your chunks in the jar until you have 4oz of wax chunks.

Final Over Pour

Now for the final stage! You can start melting the remaining 1lb of soy wax for the over pour just before you arrange the wax chunks in the jars if you want something to do while you wait for the wax to melt.

So just melt your next 1lb of soy wax, just like you did for the chunks the first time. Same temp, measurements and everything. Remember to set your timer so you don’t forget about it!

Once it is melted to 185-190 degrees, take it off the stove and add your 1oz of White Cake candle fragrance oil and stir. You will not use any dye this time, so once the fragrance oil is incorporated well and you don’t see any oils in the wax anymore, then, again, time to wait for the wax to cool! And set your timer 🙂

Let the wax cool to the same temp as above..95-100 degrees.

Now pour about 4 oz into each jar and clip the bag clips onto the wick so that it is firm and centered sitting across the top of the jars.

If you have extra wax shavings or chunks from the soy wax chunks you broke apart, you can sprinkle small pieces onto the tops before they harden for a lovely appearance!

Well, that’s it! That is how to make soy chunk candles. I should be adding some pictures soon!

ScentSational Candles Premium Soy Scented Candles

Filed Under: Soy Candle Making Instructions

  • « Previous Page
  • 1
  • …
  • 9
  • 10
  • 11

Make Soy Candles You’ll Love!

Get The Soy Candle Making Book

ScentSational Candles Premium Soy Scented Candles

How To Make Soy Chunk Candles

How To Make Soy Jar Candles

How To Make Wax Melts

  • Privacy Policy
  • About
  • Contact

Copyright © 2023 SoyCandleMakingTime.com ·